Select Page

How to setup Veeam Cloud Connect for the Enterprise Virtual Machine in Microsoft Azure Portal

This article is one of two parts to facilitate a step by step explanation of how to setup Veeam Cloud Connect for the enterprise virtual machine in Microsoft azure portal.

This article will cover how you can find Veeam Cloud Connect services in the Azure portal, how you can create a Virtual Machine (VM), choose its size, configure it and then purchase it. The settings of the VM will be described in the second part of the article that will follow later.

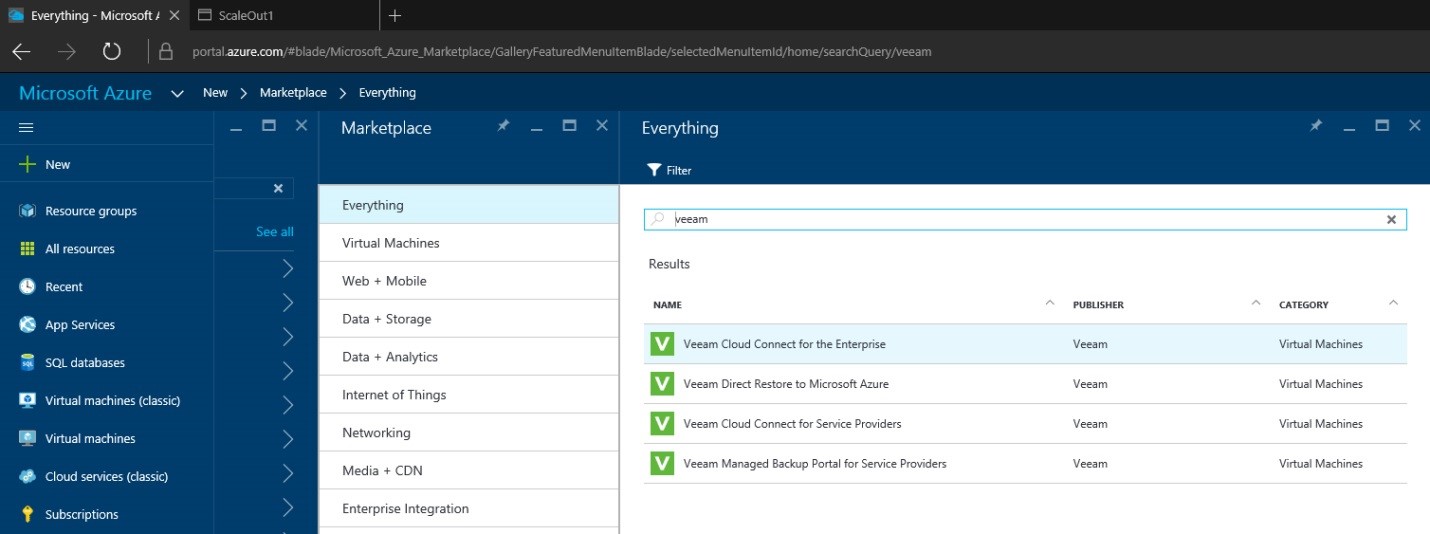
Azure Portal & Veeam Cloud Connect Services

Log into the Microsoft Azure portal, using this link: https://portal.azure.com/. Click the “Marketplace” and search Veeam in the search bar.

How to setup Veeam Cloud Connect for the Enterprise Virtual Machine in Microsoft Azure Portal
Find and click the “Veeam Cloud Connect for Enterprise” from the list. This will display the product’s description. Read through the description to understand the services you are purchasing.
How to setup Veeam Cloud Connect for the Enterprise Virtual Machine in Microsoft Azure Portal
Once you’ve read through the description of the product, you can move on to the creation process.
How to setup Veeam Cloud Connect for the Enterprise Virtual Machine in Microsoft Azure Portal

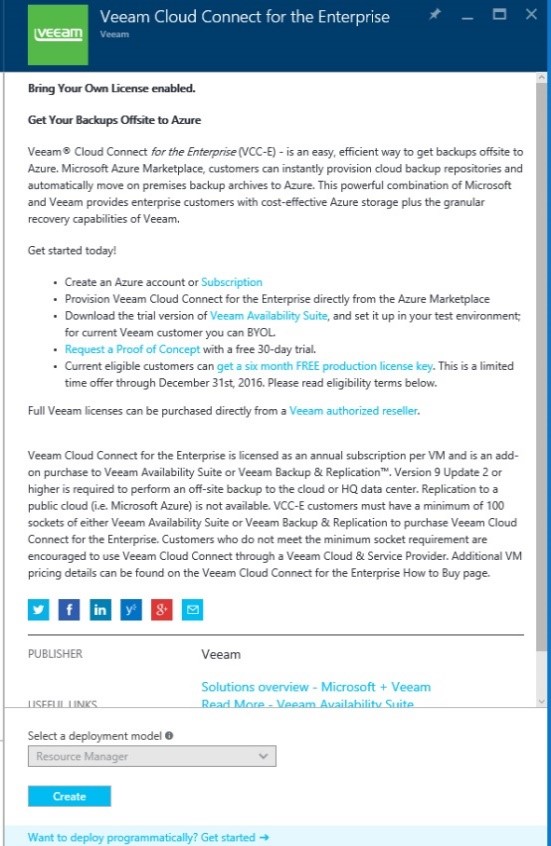
To do so, just click the “Create” button.

Step1: Creating your Virtual Machine

The creation process presents a form that inquires basic information, like the name of the Virtual machine and such.

How to setup Veeam Cloud Connect for the Enterprise Virtual Machine in Microsoft Azure Portal

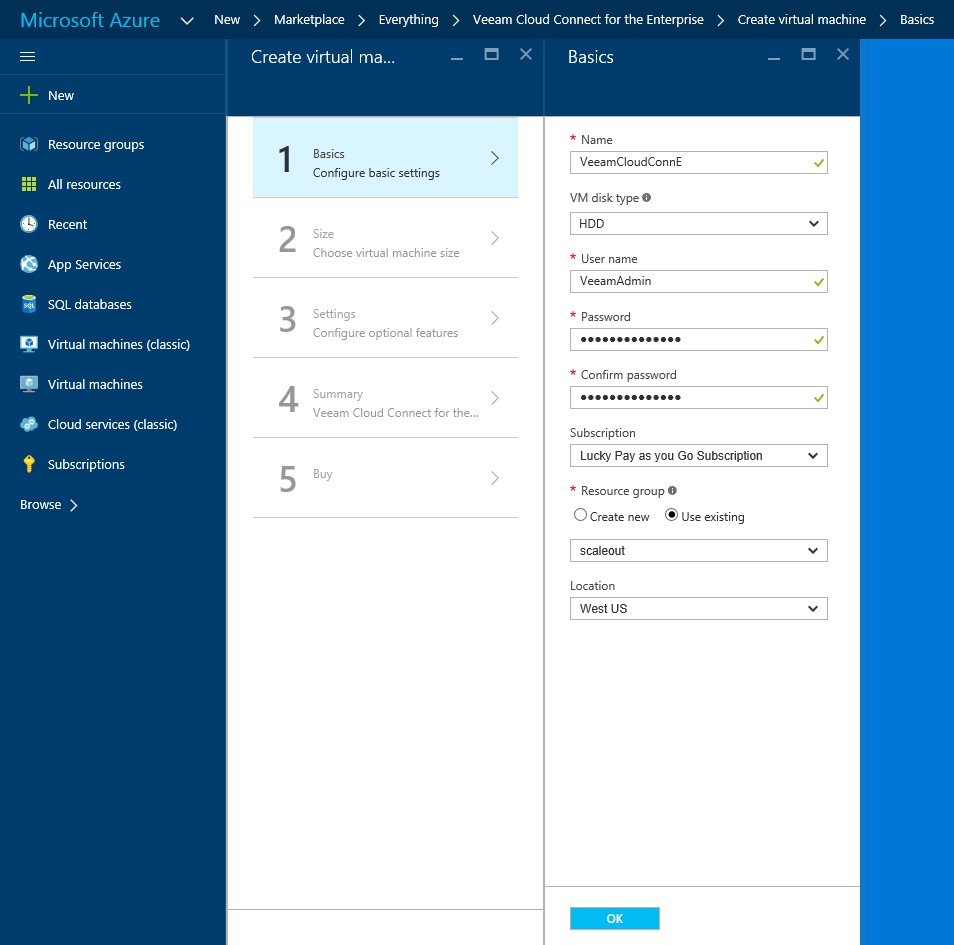
It is highly recommended to use a strong password. A password with at least 3 of the following is strongly advised: one lower case letter, one upper case letter, one number, one special character. Also remember to keep the login details (Username and Password) safe with you because you will need them to access the Veeam Cloud Connect VM in Azure.

The completion of this step will lead you to the next step: Choose VM size.

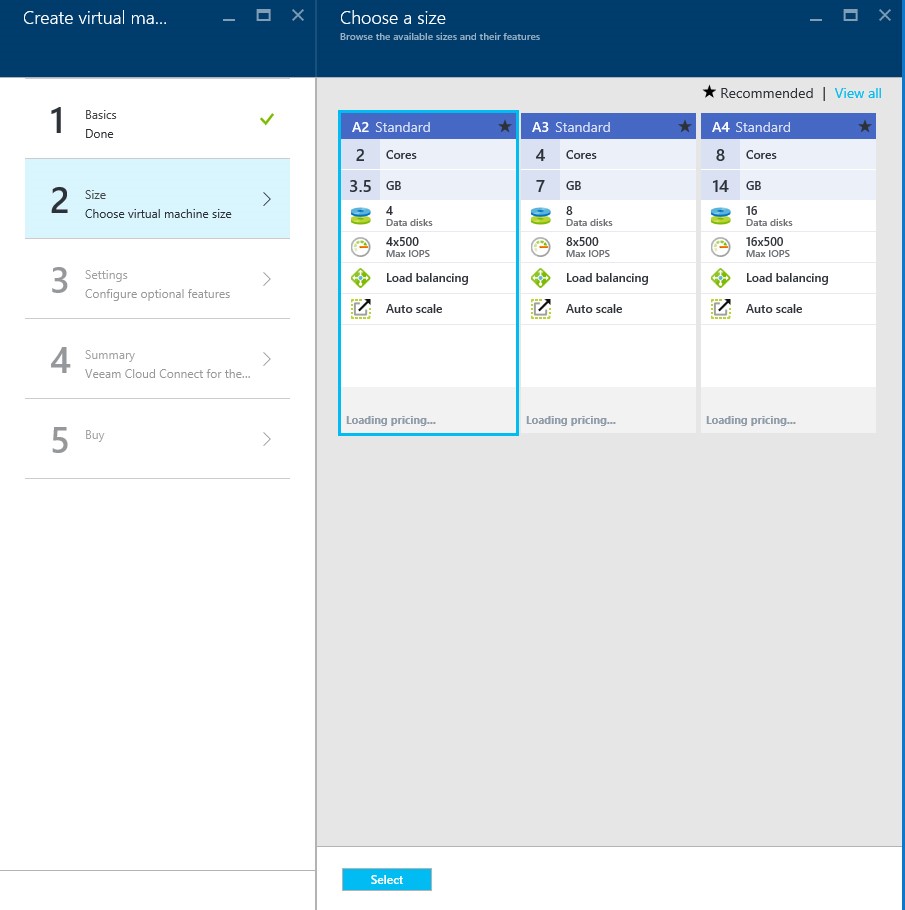
Step 2: Choose Virtual Machine Size

How to setup Veeam Cloud Connect for the Enterprise Virtual Machine in Microsoft Azure Portal

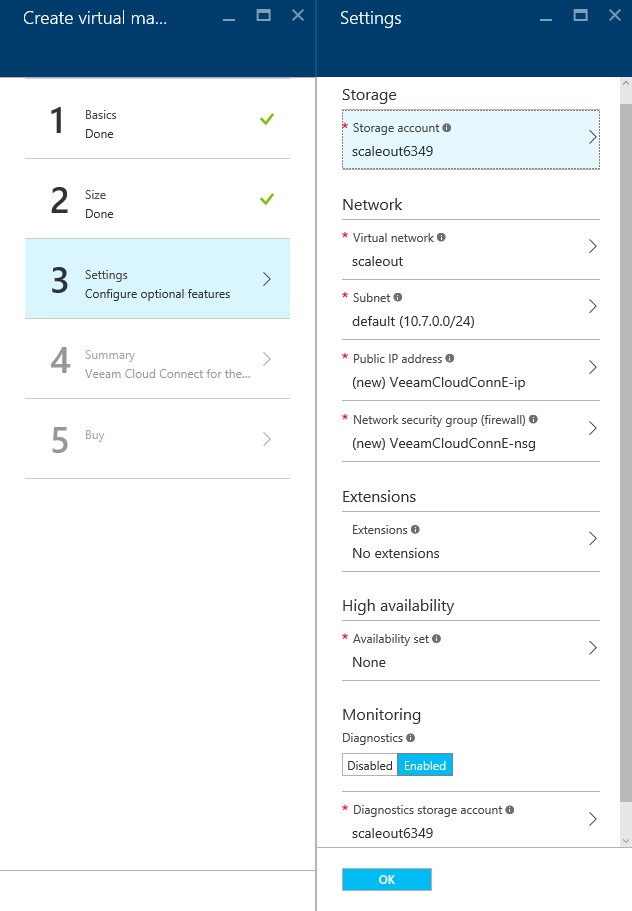
 Step 3: Configuration of Optional Features

If you have technical expertise or wish to acquire optional features that you are aware of then you can do so at this step. If not, then go with the default settings and click “Ok”.

How to setup Veeam Cloud Connect for the Enterprise Virtual Machine in Microsoft Azure Portal

Step 4: Review

This step displays your settings for the VM. You can choose to go back and make changes. If everything is in accordance to your preferences, click “Ok” and proceed to the final step.

How to setup Veeam Cloud Connect for the Enterprise Virtual Machine in Microsoft Azure Portal

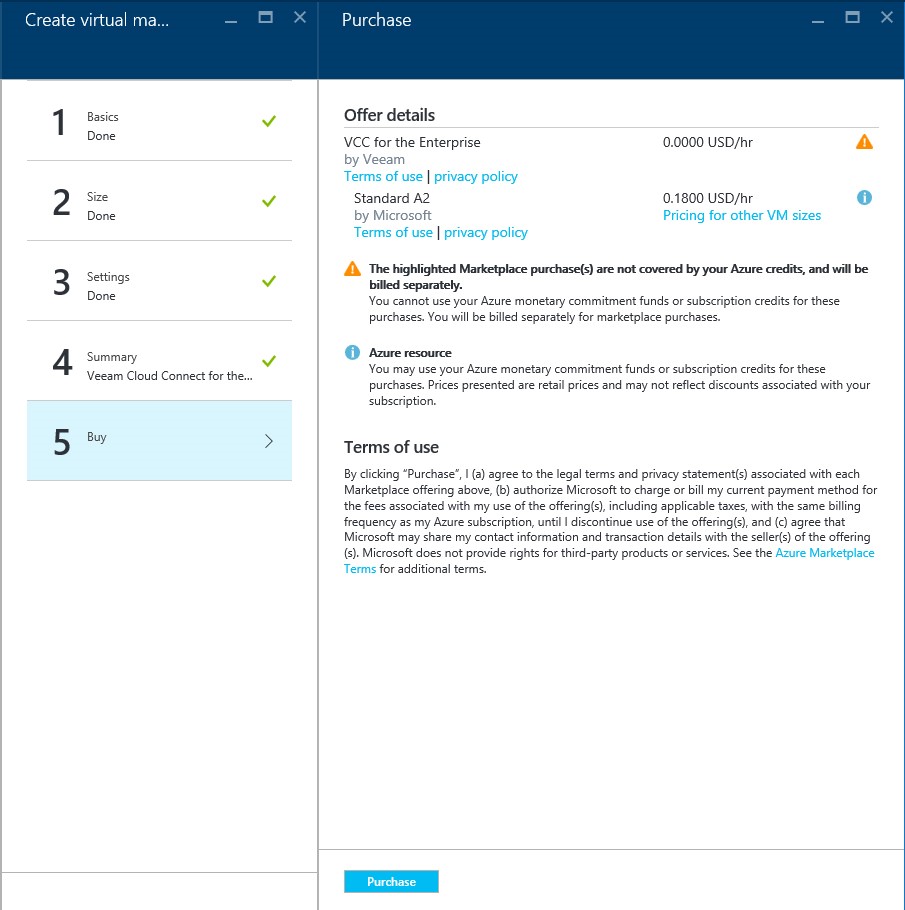
Step 5: Purchase your VM

This step will display the costs for the VM and will also display the terms of use. After reading through the terms of use, you can conclude the process by clicking the “Purchase” button.

How to setup Veeam Cloud Connect for the Enterprise Virtual Machine in Microsoft Azure Portal
This will complete the creation, configuration and purchase process and the following page will be displayed confirming the success of the process.
How to setup Veeam Cloud Connect for the Enterprise Virtual Machine in Microsoft Azure Portal
The above box shows that the VM is being deployed. Once it’s deployed and in the creation process, you’ll see this:
How to setup Veeam Cloud Connect for the Enterprise Virtual Machine in Microsoft Azure Portal
Finally, once the creation process is completed and the VM is running. The status will change from “Creating” to “Running”.

To learn about how you can configure this VM, keep checking and another article will follow containing a similar guide to this one about the configuration process.

Malvertising: The Dark Side of Online Advertising

Malvertising: The Dark Side of Online Advertising

Malvertising—once a shadowy threat lurking on the fringes of cybersecurity discourse—has emerged as a formidable adversary, directly targeting enterprises in the digital arena. As businesses increasingly rely on online advertising to connect with their audience,...

Conti Ransomware: In-Depth Technical Breakdown

Conti Ransomware: In-Depth Technical Breakdown

Conti ransomware has earned notoriety, notably for its involvement in the Costa Rican government hack. Operating as a ransomware-as-a-service (RaaS) group, Conti specializes in infiltrating networks, encrypting crucial data, and extorting exorbitant sums of money. In...

Supply Chain Attack: The Achilles’ Heel of Enterprise Security

Supply Chain Attack: The Achilles’ Heel of Enterprise Security

Supply chain attacks have emerged as a formidable threat vector in the landscape of cybercrime, posing significant risks to enterprises of all sizes and industries. Among the various tactics employed by threat actors, ransomware attacks leveraging supply chain...

How to Set Up S3 Object Storage for Veeam Data Platform

How to Set Up S3 Object Storage for Veeam Data Platform

Veeam v12 introduced Direct-to-Object storage, enabling S3 object storage as the primary backup repository. Prior to this, S3 object storage integration relied on Veeam's Scale-Out Backup Repository (SOBR), using a performance tier and a capacity tier, which extended...

Watering Hole Attacks Unveiled: A Comprehensive Cyberthreat Overview

Watering Hole Attacks Unveiled: A Comprehensive Cyberthreat Overview

Watering hole attacks, akin to their namesake in the natural world where predators strategically position themselves near watering holes to intercept prey, have become a significant peril in the digital realm. In the vast landscape of cybersecurity, understanding the...

You May Also Like

Subscribe To Our Newsletter

Join our mailing list to receive the latest news, updates, and promotions from StoneFly.

Please Confirm your subscription from the email